Advanced Setup
Instruments Configuration
instruments.json file provides main configuration for the microscopes.
{
    "instrument": "4248, Krios G4 (4.1)",
    "serial": 4248,
    "model": "Titan Krios G4",
    "name": "Krios 4",
    "type": "tem",
    "template": "krios",
    "server": "192.168.76.2"
}
Important
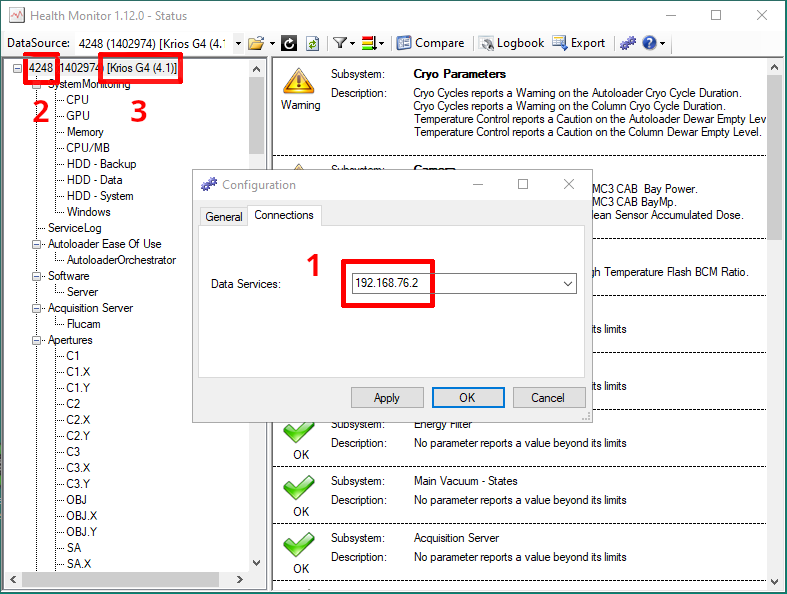
An instrument can have several associated DataSources (for HM, APM, AutoCTF, AutoStar, ToolReadiness, Velox etc). You need to select the one that has Software->Server parameter.
instrument: this field has to match the instrument in the Health Monitor. The format is “serial number, model name”. Model name can be found in the Health Monitor, it’s the text inside [] brackets (#3 on the screenshot above).
serial: serial number of the instrument. Digits only (#2 on the screenshot above).
model: custom field, used for display purposes. You can customize this.
name: custom field, used for display purposes. You can customize this.
type: database name. “tem” or “sem” only.
template: microscope platform. Allowed values are “krios”, “talos”, “tundra”, “sdb”, “pfib”. See examples in instruments.json
server: Optional field. IP address of the microscope PC (#1 on the screenshot above). This is used to directly connect to MSSQL/PostgreSQL servers on the MPC.
Security Configuration
Important
While we provide example placeholder passwords and keys in the docker/.env_example file, you should NEVER start EMHealth using these defaults.
DB accounts:
POSTGRES_USER (default: postgres) - superuser, password: POSTGRES_PASSWORD
emhealth - r/w user, password: POSTGRES_EMHEALTH_PASSWORD
grafana - read-only user, password: POSTGRES_GRAFANA_PASSWORD
pganalyze - database metrics user, password: POSTGRES_PGANALYZE_PASSWORD
[optional] MSSQL_USER and MSSQL_PASSWORD are used to connect to the MSSQL/PostgreSQL database on the MPC
Grafana accounts:
admin - administrator account, password: GRAFANA_ADMIN_PASSWORD
GRAFANA_RENDER_TOKEN is required for secure connection between the image renderer service and Grafana.
We provide a couple of scripts to simplify credentials configuration. The one below generates secure passwords and secrets and can update docker/.env values:
sh em_health/utils/generate-keys.sh
To use the new values from docker/.env, run:
sh em_health/utils/update-passwd.sh
Creating a Windows Task
To create a new task in Windows 10/11 Task Scheduler:
Open Computer Management -> System Tools -> Task Scheduler -> Task Scheduler Library
Right click and select Create New Task
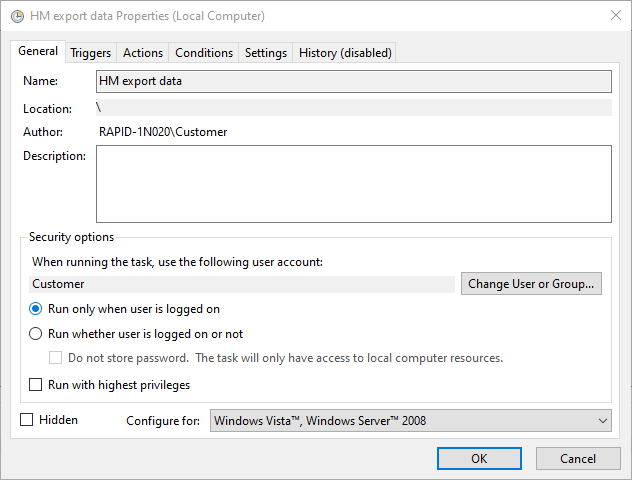
On the General tab enter a task name and make sure Run only when user is logged on is selected
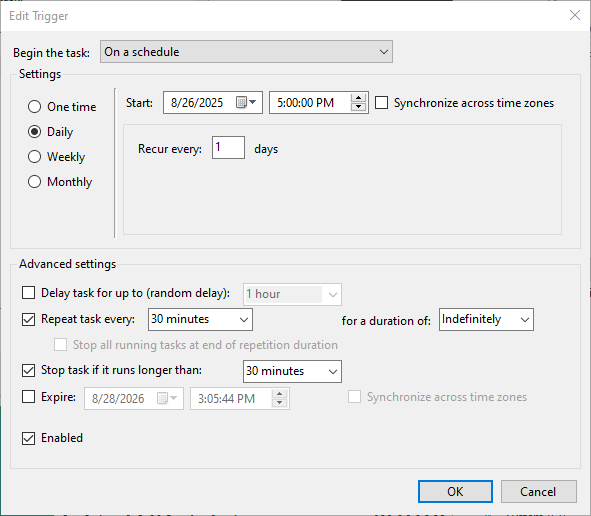
On the Triggers tab add a new trigger to repeat the task every 30 min indefinitely
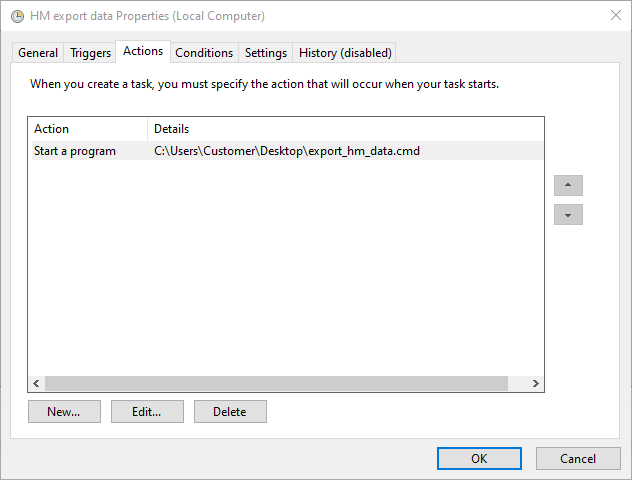
On the Action tab add a new action to start the program. Enter full path to the created batch script
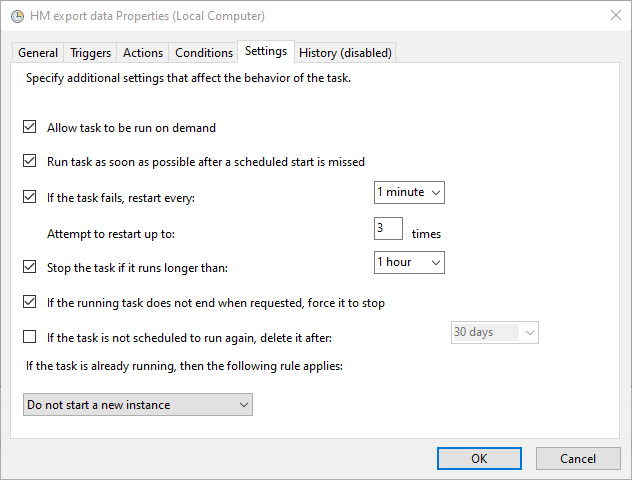
On the Settings tab select options which are shown below
Right click and run the newly created task to verify it finishes successfully.